Monday, January 17, 2011

Paper roses and lampshades

It was a beautiful, snowy, January day in Wisconsin.
The snow fell all day long, nothing crazy, just soft and gentle.


I couldn't resist comparing today's view . . .

to the view from last August!
Anyway . . .
Our plan for today was to jazz up some lampshades with paper roses - just in time for Valentine's Day. They turned out just beautifully. Vellum, cardstock, and drawing paper . . . everyone had their favorite, each one is unique, and they all turned out so well! Here are some pictures of how the day progressed.
Supplies are ready!

To make the roses, you cut out a circle, then cut the circle into
a spiral. Then, starting at the outside of the spiral you just roll,
and roll, and roll, and roll!

It takes a while, but you end up with a pretty little ranunculus . . .

Which look a lot like the real thing!


Beautiful!

Jan made some beautiful hot pink roses out of cardstock.

Gwen made hers out of vellum.

And my ranunculi are made out of drawing paper.

My lamp before . . .

and after!
Such a fun, snowy day to create flowers and
memories with some very dear friends!


Here in Wisconsin, we need those little reminders that
spring is right around the corner - or so.
And here is Gwen with a surprise gift for me! She is a partner in
crime with a coming project since it was with her help that I was
able to get a very large and heavy treasure home from Goodwill
the other day. She knew I was going to be needing these. Now
I can't wait to get started!

Linking up with:


My Backyard Eden
<br><br><br><b>Join us every Friday...</b>    

and
Faded Charm's White Wednesday


Saturday, January 15, 2011

An old window on the curb . . .

My husband and I love to drive around the Milwaukee area and look at beautiful houses and gardens. Every once in a while we see more than the houses and gardens - we see a cast-off treasure sitting at the curb just waiting to be remade into something pretty and useful. Recently, we came across an old window propped up against a tree, waiting for garbage pickup.

At one time it probably looked like this.
Well, he's such a sport. I want it, but I never want to be the one to get out of the car and get it. Let's face it - it's kind of embarrassing. That doesn't bother him. Not one bit. He'll just go up to the door to check with the owners - just to make sure they're REALLY throwing the item away. Then, out come the bungee cords! We loaded it up and brought it home. Then we scrubbed it clean, and began to envision what could be done with it.


I decided to make it into an open hutch-like piece. I put together a simple "box frame" made out 1" x 6" pine, added a couple shelves at the mullions. It's pretty rugged, but so is the window. Then I attached the window to the box frame. The window is permanently attached to the the box frame. Since there is no glass, there's no reason to make a "door" that actually opens. You can just set things inside through the openings.


I had a table that was just the right size for the bottom part of the "hutch". So I set my new "window box" on top, painted them both a medium blue, and filled it up with some favorite pitchers and teapots. All for the cost of a little gas in the car and some paint!


Finished!
Now, winters are long in Wisconsin. All winter long we dream about warm, spring days spent in the garden. My goal is to find enough cast-off old windows so I can make one of these miniature conservatories in the spring!


Or maybe I'll hit pay dirt so I can make one of these!

Check back in June!

My old window hutch is here at the:

UndertheTableandDreaming

and at Miss Mustard Seed's:


and

grabtt
Piece of Work Wednesday

Tuesday, January 11, 2011

Back to The Painted Lady on Damen


Once again, we drove to The Painted Lady on Damen, in
Chicago. We never know what we're going
 to see when we walk into this beautiful shop,
and Saturday was no exception.
The owner, Beth Harlow, has it filled to the
brim with beautiful bedding, dishes, wall decor,
unusual shabby-chic chandeliers, and refurbished
antiques.  As explained on an earlier post, I
happened upon her shop in the most recent edition
of Where Women Create, a magazine where the
 likes of Mary Emmerling have been featured.  Here are the paintings

we brought along with us!

Roses - 16" x 20"


Little Roses - 6" x 6" gallery wrapped canvas
SOLD!


Roses in a Chubby Bowl - 12" x 12" gallery wrapped canvas 

Spring Nest - 20" x 20"
(with a nest that can be a personalized with the

 number of eggs in your nest)

Antique Roses in a Chubby Bowl - 16" x 20"


So, if you're ever in Chicago looking for some 
romantic decor for your home, this would be the place!


I linked up wth Transformation Thursdays at Shabby Chic Cottage!

Sunday, January 2, 2011

Needing some green!

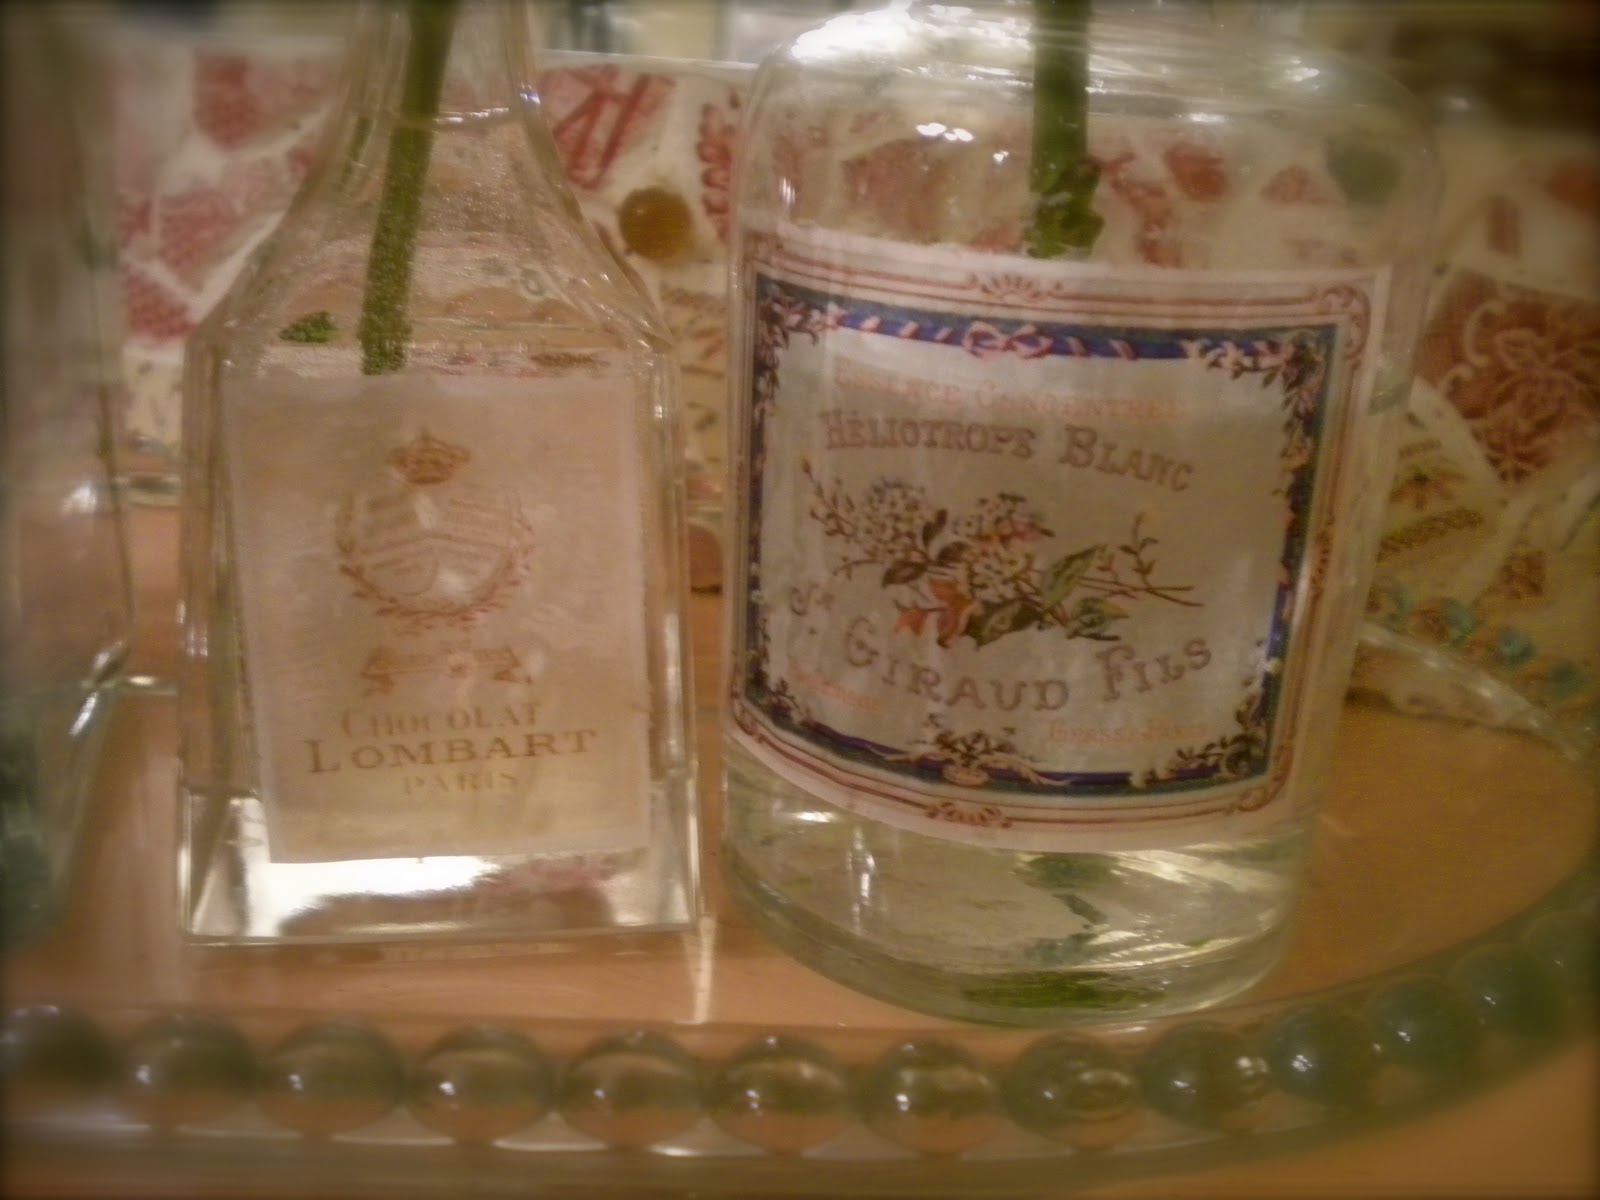
The Christmas mantle came down today and even though it's only January 2nd, I needed something to remind me that spring will indeed come again . . . someday! I needed something alive and green! I wanted to find some old clear "apothecary-type" bottles to hold some single stems, so I looked at Goodwill.

I like all the different sizes and shapes. The jars all came to $4.50.
The one on the far left is actually a Tobasco Sauce jar! Look for jars that have small openings so they can hold a single stem flower.


Then I stopped and picked up some green spider mums - alive, fresh, and beautiful!
(all words we don't use too much in January in Wisconsin)


I cut them apart, and filled the jars with water - but they're still a little plain.
Well, Graphicsfairy.blogspot.com has some very pretty labels that are reproductions from long ago. They are copyright free and free of charge. So I found some that I liked, adjusted the size, printed them out on vellum.

After putting a little Elmer's glue on the back of each "label", you just press them in place where you want them to be on the bottle. Hold it down for a bit - the vellum really wants to curl until it begins to get tacky.


They really do look like old perfume bottles!

This post is linked up with the Graphics Fairy's Brag Monday.

Saturday, January 1, 2011

A clip art lampshade

Out with the old and in with the new!
This is a lampshade from the 80s - cut and pierce parchment with velvet ribbon trim.
It's been 30 years and it shows - right down to the torn lining.
 Time for a change.


When I saw this lampshade at The Painted Lady in Chicago (shown below),  I knew
 I had found its replacement.  Either you like this, or you don't - and I do!  My shade
form is smaller at the top, so rectangular clip art as in the shade below won't work.
Mine will have to be a much more controlled version.  However, I am going to find
the perfect drum style shade to get the same look as the inspiration shade below.


But, until I find that perfect shade I'll work with what I have.  So,  I took off 
the old cut and pierced parchment panels, and printed out some clipart from 
graphicsfairy.blogspot.com.  After measuring new panels and cutting the printed 
clipart, I glued them onto the shade frame and added the curtain clips, minus 
the rings, to mimic the look of the shade I was copying.


Next time I won't wait 30 years!

This post is linked up with Saturday Night Soiree at A Little Lovely, and  The Graphics Fairy's Brag Monday

Wednesday, December 29, 2010

LinkWithin

Related Posts Plugin for WordPress, Blogger...