Showing posts with label chiffon flowers. Show all posts

Sunday, February 27, 2011

Last summer's garden, spring, and a moon garden

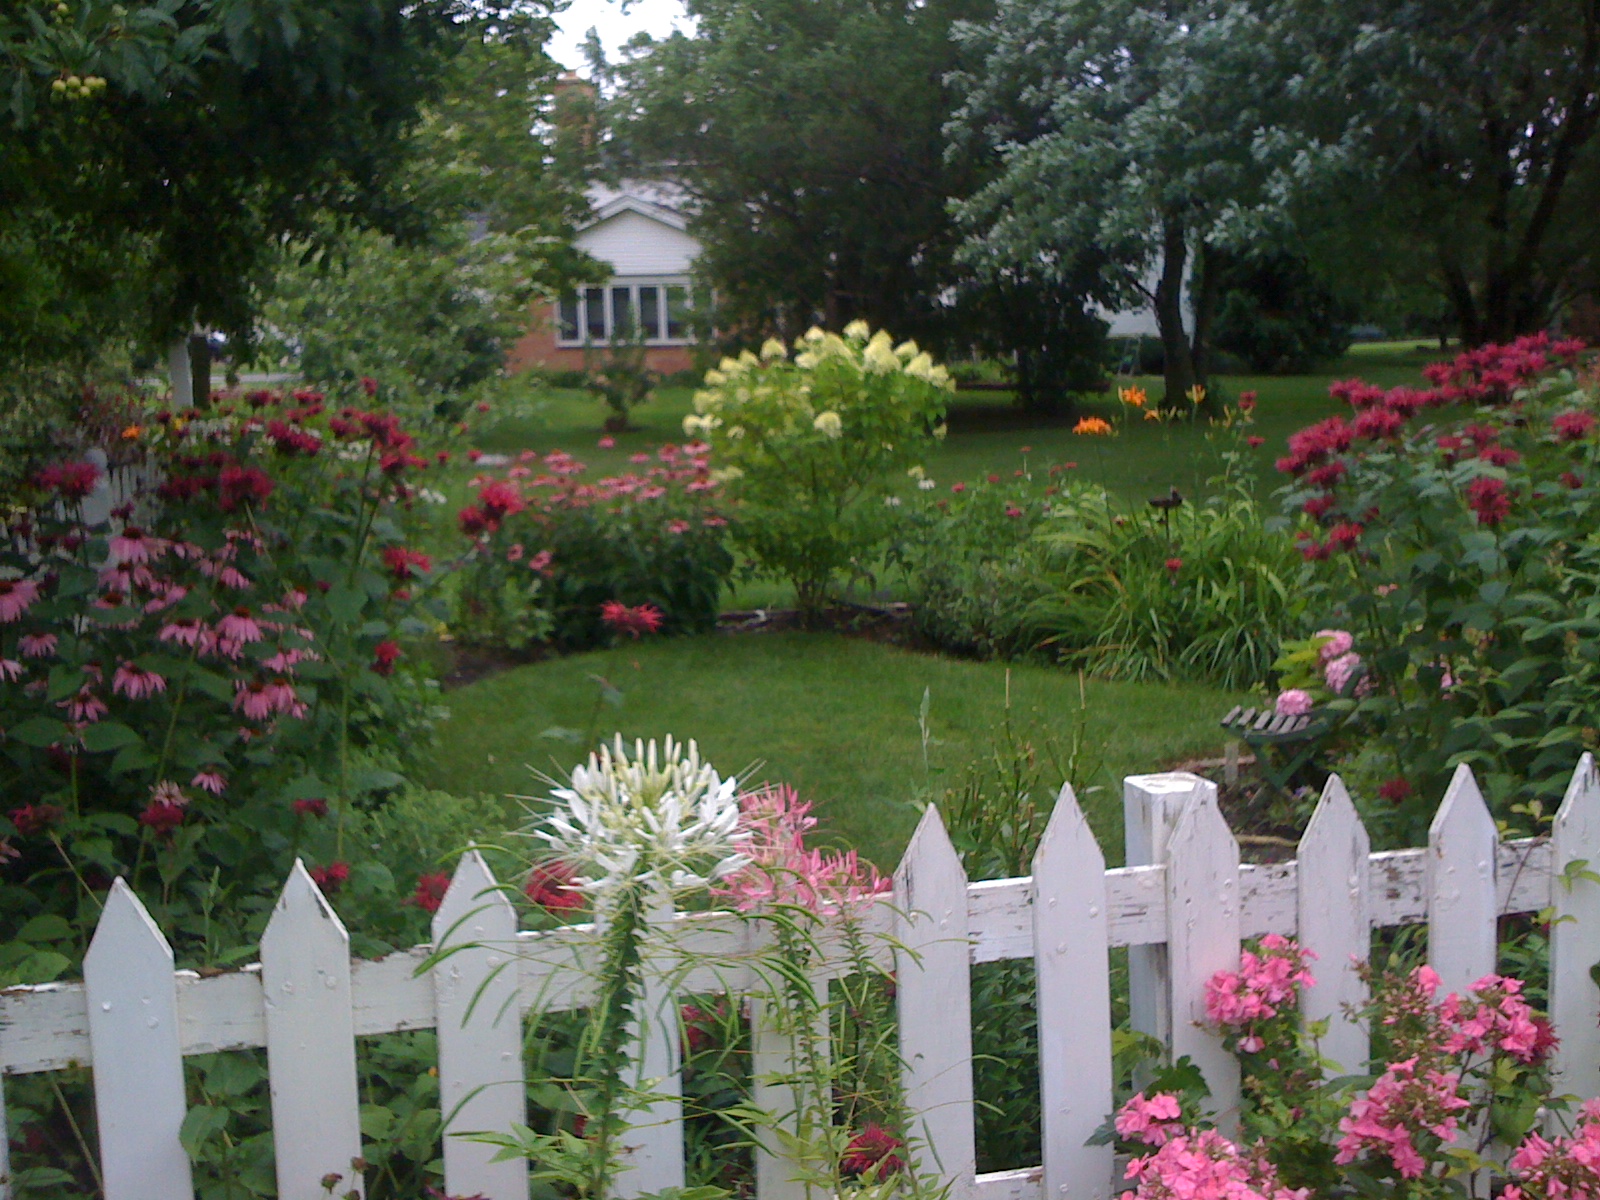
If any of you are as ready for spring as I am - these photos will give you hope!  Snow has covered our ground for so long, it seems like we'll never see the grass again.  Well, here are a few pictures to remind us that those flowers will be poking through the ground in Wisconsin in about 10 weeks.  I can't wait for a fresh load of mushroom compost to be delivered to top off my gardens.  These days I'm dreaming of the smell of thawing earth,  the rhythmic sound of my sprinkler, followed by lawnmowers humming,  and the scent of freshly cut grass.  It IS coming!

 I made the walking stones by cutting out a circle of sod and pouring in a bucketful of cement.  Then I pressed in a design with pebbles and shells, or "drew" a design in the cement with a stick.  This is a lot easier and faster than forming walking stones in a mold.  Over the years, mine have sunk a bit.  They'll need to be dug up this spring and have a little soil or gravel added underneath.
Black and Blue Salvia
 Fairy Candles (also known as Cimicifuga Racemosa, Black Cohosh, or Black Snakeroot)
 For the past two summers, we've had wrens in this little, beat up birdhouse.  They don't seem to mind that there's a hole in their roof.
 Honeysuckle vine
 Raspberry colored Bee Balm (Monarda)


My trumpet vine that took about 5 years to finally blossom - worth the wait!


And now, a couple flowers I want to add to my garden this summer . . .

RANUNCULUS
I love to paint these and I would really love to grow them.  In particular, I'd like to grow the Tecolote Ranunculus.  They are known for their long, straight stems which will be great in arrangments.  They also have a long vase-life and the shades are described as "mouthwatering"!  I think these may be my new favorite flower!


And, DAHLIAS.


And lastly, I'd like to plant a "Moon Garden" (a special garden designed to be seen at dusk and into the night, usually with all white flowers).  There's nothing like loads of white flowers glowing at dusk.  According to some sources, "night blooming flowers use their light reflecting properties and fragrance to attract insects for pollination.  They reflect the moonlight and advertise their beauty to passing moths and other insects.  Pandorus Sphinx Moths are the primary pollinators of night blooming flowers".   These moths love to hover around my Bee Balm on summer nights - they are quite large and look like hummingbirds!


The night blooming "Cereus" has been dubbed "the queen of the night" by gardeners.


Crinum

White Impatients


Summer Phlox


White Althea


Put them all together and you get a
BEAUTIFUL MOON GARDEN!


Sunday, January 30, 2011

A Valentine vase, some flowers and more

                           A dozen roses arrived the other day.
 Out of the blue and "just because"!
So sweet!
So I started rummaging through my vases and didn't really find what I was looking for.  A few posts ago, I made the French Cache Pot with a label from the Graphics Fairy.   But I gave that pot/vase away,  and I was thinking how pretty these flowers would look in something similar.  So I went back to look at more labels on the Graphics Fairy and found a few that were perfect.  Then, I went out to look for some trumpet shaped vases and found several of them at the thrift shop (for $1.99 each)!

A little spray paint, some Tacky Glue, a shot of Matte Acrylic Spray, and I had exactly what I was looking for.  Since the Graphics Fairy has labels and clip art to go along with absolutely anything, you can make vases to go with any holiday!  Just look for vases that have either flat or smooth round sides that will hold the labels you like.  Remember, you can resize the labels before you print them so that they're just right for your container.  The clip art from her site remains clear and crisp, even when the image is enlarged to the size of an 8 1/2 x 11 piece of cardstock.

I love this owl and he would look great on a Halloween
 container.  Use a clear glass or ceramic container and 
fill it with chocolate pretzel rods or some other Halloween treat.
This would look nice on a Thanksgiving
container holding rustic colored mums.
Beautiful little rabbit print would be perfect decoupaged
 on a small square of plywood and attached to an Easter basket.
Valentine's Day, of course!
I love this patriotic label.  I'd attach it to a
metal container filled with red licorice 

or American flags on a Fourth of July picnic table.

So, once you have your ceramic container painted, print out your clip art onto card stock.  You can adjust the size of the clip art printout before you print.  I brought mine down to 70% because the design would have gone too far around my vases if left at 100%.   Then carefully cut around the image.  Evenly spread some Tacky Glue all over the back and smooth it in place on the container.  When it's dry, I like to rub the container all over with Old English Scratch cover for an aging effect.  But it looks great without the antiquing also. Then a little Matte Acrylic Spray and it will be sealed against water damage and wear and tear.   


One for my mom who loves all things blue and white!


My beautiful roses.


A vase for Easter with this sweet label from the Graphics Fairy


And, finally, a pretty little nest and bird label for a spring bouquet.  It won't be long and we'll be looking at seed catalogs and planning our summer gardens.  I'm looking forward to filling up lots of vases with my own garden flowers!

From green glazed Goodwill find, to one-of-a-kind vase!


Sharing this post on: 

and


Sunday, January 2, 2011

Needing some green!

The Christmas mantle came down today and even though it's only January 2nd, I needed something to remind me that spring will indeed come again . . . someday! I needed something alive and green! I wanted to find some old clear "apothecary-type" bottles to hold some single stems, so I looked at Goodwill.

I like all the different sizes and shapes. The jars all came to $4.50.
The one on the far left is actually a Tobasco Sauce jar! Look for jars that have small openings so they can hold a single stem flower.


Then I stopped and picked up some green spider mums - alive, fresh, and beautiful!
(all words we don't use too much in January in Wisconsin)


I cut them apart, and filled the jars with water - but they're still a little plain.
Well, Graphicsfairy.blogspot.com has some very pretty labels that are reproductions from long ago. They are copyright free and free of charge. So I found some that I liked, adjusted the size, printed them out on vellum.

After putting a little Elmer's glue on the back of each "label", you just press them in place where you want them to be on the bottle. Hold it down for a bit - the vellum really wants to curl until it begins to get tacky.


They really do look like old perfume bottles!

This post is linked up with the Graphics Fairy's Brag Monday.

Tuesday, December 28, 2010

Make a necklace inspired by Anthropologie

As I was scrolling through the "statement" necklaces on Anthropologie's website,
I saw several I'd like to make.   I thought I'd give a combination of these two
 necklaces a try - putting the organza flower (shown in peach on the first necklace) in
the spot where the sparkly beads are on the second necklace.

        19784990_000_b.jpeg

        19318922_046_b-1.jpeg
 Kirsten and Gwen are willing participants and they have arrived,
beads in hand.  So, here we go!  We have not had much experience
in this area, so we hoped for the best.
We used chiffon for our flowers but the tutorial link above for organza 
flowers worked just fine.  First we cut the chiffon circles for the flowers.  
You can make your flower with as many "petals" as you wish.  
It's a very feminine touch to the necklace.  Kirsten wins with the most petals!

Then, very carefully, hold the circles close to a flame so the edges get
sealed off and a little bit curly.  Later, we stack them, sew them,
and put a few beads in the center.
Then we arrange the beads.

Slip the beads onto wire, attach the chiffon flowers, 
add some chain, and then a clasp.
Kirsten's necklace

and Gwen's . . .

and finally, mine!


One word can describe our jewelry making session today
and that would be . . .
CATHARTIC!
AND, the necklaces are beautiful!!! 
We even had time to enjoy a little treat and coffee when we were done.
Thank you for such a fun morning, Kirsten and Gwen!  

Now, get ready for our next project (shown below)!
Anthropologie's Amlapura and Kuta Necklace - $198
We could make this!

LinkWithin

Related Posts Plugin for WordPress, Blogger...