Saturday, March 31, 2012

MAKE YOUR OWN WIRE BASKET - A TUTORIAL (KIND OF)

I love hydrangeas!  And the other day I came upon some beautiful blue ones at Lowes.  They are beautiful plants - about 2 feet tall and 1 1/2 feet across - for only $11.99 each!!!   This variety grows to 3-5 feet across and 3 - feet tall.  I've normally had to pay about $45 for one this size.  So I scooped up 3 of them and brought them home.
 One for the kitchen table . . .
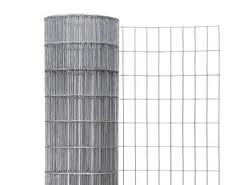
And the other two for the dining room, since it's too early to plant them outside.  And this is where the wire basket comes in.  I had a roll of wire fencing kind of like this.

I cut off a length to use for my basket . . .
 Used some VERY sharp, heavy-duty wire cutters . . .
And after lots of cutting and bending and cutting and bending . . .
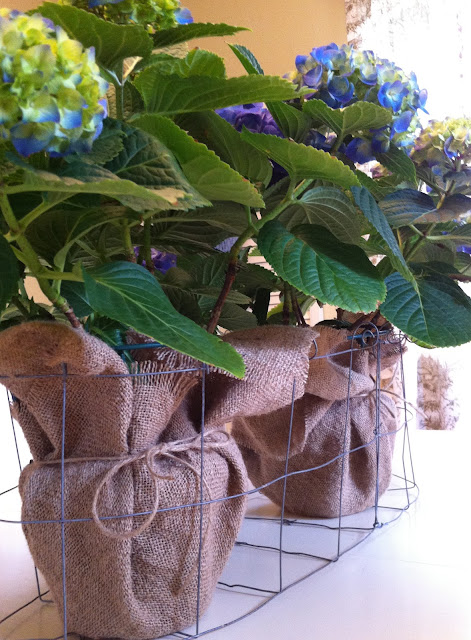
I ended up with a basket big enough to hold the other two plants.
So I took off the blue plastic pot covers and instead wrapped each plant with some burlap and tied it with twine.
I love the little curls at the top of the basket! 

One roll of fencing is not very expensive - I believe it was under $15.  One end of the fencing has large openings in the mesh (I used that end here), but the other end had small openings.  You could make MANY baskets from one roll.  The possibilities are endless for shapes and sizes and you could paint them, weave burlap strips in and out of the wire, or leave them plain.  You could use them for plants as I did, make a bin for potatoes or onions, or make them just the perfect size to hold bathroom towels, a round one to hold plates at a buffet table, a rectangular shape for firewood, magazines . . . the list goes on and on because you can bend the fencing into whatever shape suits you, square, round, whatever!   You could also add handles or even make a liner out of a canvas drop cloth or muslin.  Or, how about wiring a prism, pearl, or bead from each of the wire "curls" around the top of the basket?  Or wiring on a small wooden sign with a label or graphic from the Graphics Fairy?    And on, and on, and on!
I plan on working on some drawings tonight to show the process of making a wire basket like this.  The photos I took of the fencing as it was taking the shape of a "basket" just didn't turn out.  I couldn't capture a good perspective of what was going on so I think drawings will be much easier to follow.

Meanwhile, here's one more look at these gorgeous flowers!
So. Beautiful.
They don't even look like they could be real!
But, believe me.  They are!


Sharing on:


Wednesday, March 28, 2012

BEAUTY BEFORE THE BLOOM

With our warm March weather, everything is starting to bud and bloom a few months earlier than usual.    Add that to the fact that I haven't been home during the day, watching all the seasons arrive, for many years.  I have time now to walk around our yard and gardens and really watch what happens.  Today I was looking at some of the buds thinking, "This reminds me of the preteen girls I used to teach!"  I'll explain.

There is so much beauty before the bloom!  We're always waiting for the flowers, shrubs, and crab apple trees to be in full bloom.  But there is so much beauty before that happens, if we take the time to look and appreciate!  

A sixth grade classroom in the spring is full of "buds", all in a hurry to get to the blooming stage of their life.  Oh, to be 12 years old again and able to appreciate the raw beauty before we bloom!  There is beauty in every season, but spring is the one that is young and fresh and full of expectation!

So, today's post is just some photos of a few tiny bouquets I picked today.  I hope you can take time to see and appreciate the beauty before the bloom!  

 And the last one is absolutely . . .
MAGNIFICENT!

"Springtime is the land awakening.  The March winds are the morning yawn."
-Lewis Grizzard


Sharing on:


Faded Charm Cottage


Monday, March 26, 2012

BURLAP SUBWAY SIGN PILLOW

Yesterday I promised to show you a housewarming gift I've been working on.  So here's a very short little tutorial on how to make a burlap subway sign pillow, perfect for welcoming someone to a new community - along with a link to Gillyflower Cottage just in case you don't want to make it yourself!

Start with fabric paint - especially if you want the pillow to be washable.  I mixed mine with a little white acrylic to tone down the black a bit.
 A small nickel size blob of each color was a just right for two pillows.
Mix it up until you get the color you want.
Meanwhile, it's a good idea to use some painters tape so your letters line up in a straight line.  Here I prepped for two pillows running the city name down the middle.
 I used a 2 1/2" letter stencil.
 A 4" linen strip was sewn to the top of the pillow creating a finished size of approximately 12" by 28".
Use a light hand while stenciling if you want the pillow and name to have a time-worn look.


 After sewing around the edges of the pillow (right sides together), it is reversed, stuffed with fiberfill, and then decoratively whip stitched with one ply twine.


I made two pillows - one as a gift and one to put in my shop.  If you're interested in a subway sign pillow with your city (or family) name, it is available for purchase at my Etsy shop, Gillyflower Cottage.

Now to wrap up this one and hand deliver it to our new Wauwatosa resident - on her BIRTHDAY!


WORKROOM ORGANIZATION

I am often referred to as being "crafty".  If you're reading this, you probably are too!

To me, that sounds like someone who sits around crocheting pastel doilies, painting flowers on plastic pots, or making things out of toothpicks.

 I'd rather they say that I'm creative, or imaginative, or innovative, wouldn't you?  Thus, the subject of this post . . . workroom organization!  (It is not a craft room!)

So.  My workroom is loaded with lots of supplies and containers so that everything is always organized.

I like organized.

I have cubbies for the little few-of-a-kinds . . .

A glass-topped desk where I can store my some of my favorite books . . .
 
A place for odds and ends, my paper cutter, and stencils.
 Visual memories of back when my kids were small . . . and days in the classroom.  I did the cross stitch 33 years ago, while pregnant with my first born!  I remember walking through the fabric store with my mom and picking out that kit!  Where did all those years go?
Take a closer look at that framed piece I got from my students.  Even they knew that organization was important to me!  I used to remind them, during the time that was regularly set aside for desk cleaning in my classroom, that they would be much more productive if they were organized!  I have also raised two VERY organized young men who both happen to be VERY productive!  :)
Jars of often-used supplies right at my fingertips . . .
 buckets of ribbons etc . . .
bins full of stuff . . .


because you just never know . . .
baskets of threads and beading supplies . . .
boxes . . .
of course, piles . . .
and piles . . .

and more piles . . .

A place to store interesting papers . . .

(I just KNOW there are things waiting to be made out of those coffee sleeves and colorful bags!  When it comes to me - I'll be ready!)

A little whimsy . . .

that serves as a constant reminder that, one day soon, I need to take that step of faith with Miss Gillyflower . .
My trusty 50+ year old Kenmore . . .
And a nearby pouch of pre-wound bobbins . . .

Even my pin cushion is organized!
So now it's off to my workroom - one of my favorite places to be.  Today's project involves making something for a young mom I recently met.  Something that will serve as a welcome to her new home!

I'll show you the results tomorrow!


Saturday, March 24, 2012

FREEZER PAPER STENCIL PILLOW

Good Morning!

This morning I finished up a pillow for the patio.  I wanted to take some outdoor pictures but it's another really wet, foggy, chilly day.  So, I had to be happy with indoor photos.

The pillows I'm working on all have some turquoise in them and this is the first.  In the photos, the bird looks like a completely different tone of blue than the background fabric - but in real life the fabric color and the bird color are a perfect match.  So, keep that in mind . . .

I've only done freezer paper stencils a couple times, but every time I do it I am reminded of how great this method works!  It's so amazing and fun to do!  Many of you have used this method often, but for those of you have not, you should really give it a try.  It is so easy - a child could do it!  And the results are perfect every time!

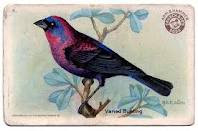
To begin with, I took this vintage bird graphic from the Graphics Fairy and traced the outer shape of it onto my freezer paper.
After tracing, you just very carefully cut out the image.  Every little mistaken cut will show up when you stencil, so you want to cut it out carefully.


Then put the waxy side of the freezer paper down on the fabric and iron it on.  I use the highest setting (no steam) to iron it onto the fabric.  Make sure all the cut edges are firmly attached to the fabric so that paint doesn't seep underneath.  Also, if you look at the bottom of the picture you can see that, along with the general shape of the bird, I also cut out the little space between the birds legs as he's standing on the branch.  Just position it correctly and iron it on too.  
Since, I won't be using this stencil again, I mix my paint right on the freezer paper off to the side of the bird.  But I've read that you can use these stencils over and over before the waxiness of the freezer paper finally goes away.
To get a nice clean line, make sure you get right up to the edge of the freezer paper.  Don't use big globs of paint on the brush - just keep loading and then painting the fabric with a straight up-and-down motion until the cut-out area is covered.  When the paint dries it becomes even more opaque.  
(Also, it's worth it to buy a good, flat-topped stencil brush.  You'll get much more even results.)
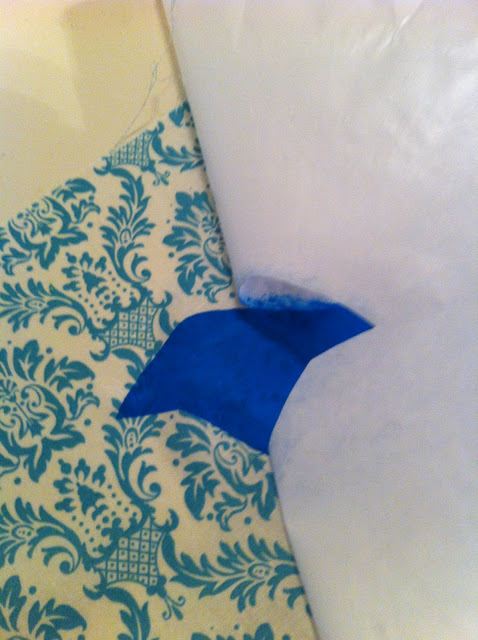
Here comes the fun part!  Just grab a corner of the freezer paper and pull it away from the fabric.  It works beautifully every time!
You also get really crisp, clean edges!
 
After the paint dries, iron the stencil with a hot, dry iron - to set the paint.
My pillow has a simple envelope closure in the back.  
 As soon as the sun comes out, I'll have to hose off the patio and put the pillow in it's outdoor spot!


Sharing on:

LinkWithin

Related Posts Plugin for WordPress, Blogger...