Showing posts with label beading. Show all posts

Tuesday, December 28, 2010

Make a necklace inspired by Anthropologie

As I was scrolling through the "statement" necklaces on Anthropologie's website,
I saw several I'd like to make.   I thought I'd give a combination of these two
 necklaces a try - putting the organza flower (shown in peach on the first necklace) in
the spot where the sparkly beads are on the second necklace.

        19784990_000_b.jpeg

        19318922_046_b-1.jpeg
 Kirsten and Gwen are willing participants and they have arrived,
beads in hand.  So, here we go!  We have not had much experience
in this area, so we hoped for the best.
We used chiffon for our flowers but the tutorial link above for organza 
flowers worked just fine.  First we cut the chiffon circles for the flowers.  
You can make your flower with as many "petals" as you wish.  
It's a very feminine touch to the necklace.  Kirsten wins with the most petals!

Then, very carefully, hold the circles close to a flame so the edges get
sealed off and a little bit curly.  Later, we stack them, sew them,
and put a few beads in the center.
Then we arrange the beads.

Slip the beads onto wire, attach the chiffon flowers, 
add some chain, and then a clasp.
Kirsten's necklace

and Gwen's . . .

and finally, mine!


One word can describe our jewelry making session today
and that would be . . .
CATHARTIC!
AND, the necklaces are beautiful!!! 
We even had time to enjoy a little treat and coffee when we were done.
Thank you for such a fun morning, Kirsten and Gwen!  

Now, get ready for our next project (shown below)!
Anthropologie's Amlapura and Kuta Necklace - $198
We could make this!

Sunday, December 19, 2010

Make an owl coin purse

Christen and I are ready to make our Bon Mot Owl Coin Purses.  
We have the outer fabric, the lining, the beads, and the purse frames.


The first thing we need to do is design the pattern
 for our coin purses.  We got the directions here.  
Mess . . .

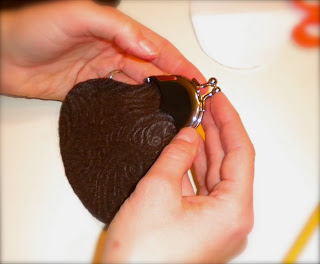
Trying on the purse frame for size . . .
Then after a lot of sewing, adjusting, sewing, and
adjusting, and finally sewing the front and back
together . . . it's time to turn the coin purse "inside out"
and see how it looks!


Then we glue on the purse frame and . . .

Done!
 What a fun night!  Thank you Christen, for hanging in there with me!
Also, thanks to Dan, who patiently waited for our project to be complete!
(This was NOT a quick project!)

Savings?  Immeasurable for the time spent figuring it all out with my
sweet daughter-in-law, Christen!


LinkWithin

Related Posts Plugin for WordPress, Blogger...