Wednesday, July 11, 2012

PATIO PILLOWS

We're in a drought here in SE Wisconsin, so the gardens are doing okay as long as you water them every other day.  But they are NOT thriving!  There's just nothing like rain water to make a garden grow.  The grass is burned out to a whitish yellow,  the flower blooms are smaller, and the rabbits are eating everything in sight.  They're thirsty too and I suppose my garden flowers give them something juicy to munch on.  Fortunately they have stuck with eating only two types of flowers in the garden (snapdragons and mallow) and the rest don't seem too attractive to them.  So it was time to bring some  artificial flowers/color to the patio.

I've posted about freezer paper stencils in the past, so you can see more examples here and here.  But all you need to do for these pillows is:

1.  Cut a free-form flower in your freezer paper.  Throw the center "flower shape" away.  Then iron the "flower frame" (shiny side down) onto your fabric choice.  You can cut any shape into your freezer paper.  Plus, this is something even small children could do!
 2.  Take some fabric paint and a sponge, or in my case, a can of indoor/outdoor spray paint.  I really like Valspar brand from Lowes - it has a really nice cap option and quite a few colors too.  I've never used spray paint on fabric before, but this paint is durable, just what the pillows need to be!
3.  Spray an even coat all over the stencil area.
 4.  Gently pull away the freezer paper once the paint is not shiny wet.
 5.  Ta Da!  You have a nice, crisp stenciled flower for your patio pillow top!  Flower shapes like this remind me of the 60s!
 I did another one  with a circle of freezer paper ironed in the center, to mask off that area.
 6.  Then just sew them to a backing fabric, plain or fancy, put your pillow form inside, and sew it shut.
 7.  Then invite some good friends over for a craft night and make some more!
8.  Or . . . invite some friends over for a craft night to make ANYTHING!  

That's what I'm doing.  Four of my book group friends will be arriving tonight with hammers and pine planks in hand for a summer evening of creating!  We'll save stenciled pillows for another night - tonight we're going to make quite a racket in the backyard with the sound of 5 hammers and my circular saw piercing the darkness!  


Saturday, July 7, 2012

A LITTLE WOOD AND A LITTLE WIRE

Look what you can make with a little of this -
cedar fence dog-eared picket $2.15
and a little of that:
YARDGUARD welded wire fencing (3' x 50' roll)  $32.00
BOTH FROM HOME DEPOT
Not long ago I had a few friends over for a little basket making.  They just needed to bring their own wire cutters - I supplied the wire fencing from my endless roll and the cedar picket leftover from another project.  I've had this roll for years and have made lots of projects out of it.  I thought this would take care of the rest of it but I STILL have some leftover! 

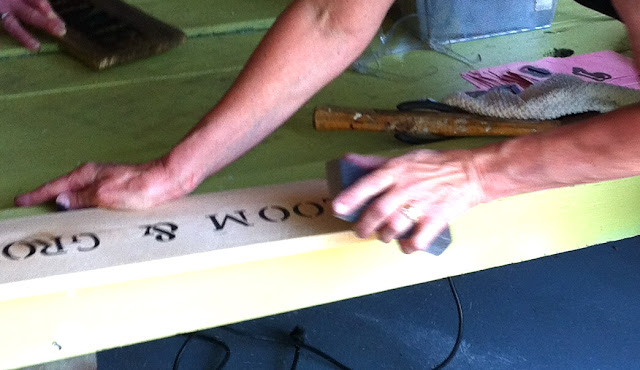
Everyone made their own basket and then stenciled a small wooden sign that was wired on the front.  So today's post is just some pictures of the process.  It was a beautiful summer day and so fun to spend time with great friends.   You can find the basket instructions here.  


Forgot to mention - everyone also brought a delicious salad and we ended our morning with a salad buffet on the patio.  It was such a beautiful summer morning made even better by spending it with great friends AND the fact that everyone went home with a SUCCESSFUL project!  

Next time . . . power tools!


Wednesday, June 27, 2012

CEDAR PLANK **SHIPLAP** HEADBOARD

A few days ago I posted some headboard photos I really liked with the goal of creating one of them for our bedroom.  After my little blogging hiatus, I'm learning all over again that a blog is a good device for getting your projects done!  Blog about it and you've kind of committed to it, so it forces you to get up and get going!

I love the combination of rough horizontal cedar planks and curves.  You can achieve a look that's pretty and curvy, but keeps a more rustic touch with the rough cedar.  Painting the end product kind of encases all those rough edges so it's not at all "pokey".  

So, to get started, I picked up 8 pieces of cedar fencing, got out some newspaper to make a pattern, and got going.  First I made a pattern for a curvy headboard - you'll want to make just one half of the design.  You can trace the design onto one half of the boards and then flip it to do the other half. 
  So just tape several pieces of newspaper together to get the size you need and start designing!
 Once the newspaper pattern is cut out, then lay out your cedar boards on a flat surface.  On top of that, lay a piece of plywood or hardboard.  I had to use two pieces of hardboard - each 2' x 4' because a full 4' x 8' sheet won't fit in my little car.  Then start tracing out your design.
 As you can see, due to my smaller backing boards, the sides of the headboard are missing the backing.  Once I get the shape of the headboard all cut out, I can use the backing scraps to fill in the these areas.  
 The backing gets nailed down to the planks every couple inches.  Make sure your nails are long enough to go into the cedar planks, but not so long that they poke through the other side!!!  
 Then using a blade for curvy cuts, use a jigsaw to cut out around the line you've drawn.  The right blade makes all the difference.  You'll only get frustrated if you try to use a blade meant for straight cuts to do this.  The right blade in your jigsaw will cut right around those curves like butter.
 Here's a picture of the back of the headboard with the scraps all cut to fill in those side areas.
Then to paint it . . .
I painted kind of sparingly to give it more of a worn look.
 For hanging, I used something I saw somewhere on the internet but I don't remember where.  I took a board about 24" wide and used my jigsaw to cut it in half - on an angle - the long way.  I'm sure there's an official name for this but I don't know what it is.  Adhere one half to the back of the headboard - make sure the angled edge is at the top and that it angles down, from top to bottom. The other piece is attached to the wall in such a way that the headboard just slides down on top of it and the two pieces lock together.  Does that make sense???

After lots of measuring . . . and measuring . . . and measuring . . . we got it on the wall.  Evenly.  I love it!  It's the perfect rustic, curvy headboard I was imagining!

By day . . .
And by night . . .


Thanks for stopping by!

Sharing on:
Funky Junk Interiors


Saturday, June 23, 2012

A NEW HEADBOARD

Hello again!

It's been almost 2 months since my last post and a good break from blogging.  But I might be ready to get back at it . . . at a much more leisurely pace!  Being away from my blog allowed me to concentrate on all the blog updates I receive on email and I discovered something.  The following might not be true for everyone, but it was true for me!  

I don't WANT to read any particular blog's post EVERY DAY!   So why would someone want to read MINE every day??  Once or twice a week would be more than enough!  

I also discovered that there are almost as many hits on my blog when I'm NOT blogging as when I AM blogging.  What?!?!  Yes, it's true!  The traffic on my blog has not really changed much in this 2 months break.  People are still googling key words that I've left on my posts and checking out previous projects.  Pinterest has also been a HUGE boon to my blog hits.  That was kind of comforting.  :)

So.


I don't like all the painted embellishments on this one, but love the shape of the headboard.

From Centsational Girl


We've been in the process of some home improvements around here, which included the repainting of our bedroom.  Along with that comes the plan for a new headboard.  So, today, some photos of some inspiration for that headboard.  Check these out and let me know what you think!

(I love the pillow on this last bed too!)

I'll be back!

Sunday, May 6, 2012

NO POSTS? WHAT'S GOING ON?

Greetings!

Thank you for all your sweet emails wondering if I'm okay!  I thought maybe I should let you know what I've been up to.

My hands have been in the paint bucket and I'm not painting anything very interesting.  Therefore I haven't posted pictures or anything.  I just didn't think you'd be interested in reading about this:
or this:
I'm just doing spring clean-up stuff and loving the fact that I have the time to do it!  

We DO have a new nest right outside the back door though.  I'm not sure what kind of bird made the nest, but there are 4 eggs in it.  This one is not as easily photographed (smarter bird than the last one), and flies out so quickly whenever we're near that we can't even tell what kind of bird it is!  We just know it's little and quick and it lays blue and brown speckled eggs.  We'll see . . .

So you see, I am still alive and kickin'!   Just taking an extended blogging break!

But . . . have no fear!

I'll be back!

Saturday, April 21, 2012

SQUIRREL STEW

Bad news.

Remember our beautiful first egg?
 Then our second?
And the third?
Then, this afternoon there were four beautiful blue eggs.  
We went out for coffee and when we returned, I checked the nest to see if there was a fifth egg.

But instead we found this.

Mass murder.  
So sad.

Exhibit A.
Exhibit B.

The only thing that makes me feel better is the fact that they weren't little hatched babies yet.  So they didn't have to suffer.  But the mom is probably pretty stressed out.  We're thinking she might possibly have a fifth egg and may risk coming back to the nest for one last try.

But chances are, she's done.  

And even if she isn't she probably doesn't want to go back to the scene of the crime.  

I don't blame her.  

I wouldn't either.

Special thanks to TracyMB at Crow's Feet Chic for the "revenge recipes".  

(It's actually pretty gross, and I could never do it, but it makes me feel better to threaten it!)

And . . . we're pretty sure we saw a squirrel in the yard with "egg on his face".

This is what he deserves.
(It's really pretty disgusting.  I would advise you not to read it.)

SQUIRREL STEW

3 squirrels, cleaned and cut up
1/4 cup all purpose flour
1 tsp. salt
1/2 tsp. pepper
2 slices bacon
2 T butter
5 c water
1 - 28 oz. can whole tomatoes
1 chopped onion
1 heaping T of brown sugar
2 potatoes cut in cubes
1-10 oz. pkg frozen lima beans
1 c frozen corn
3 T flour

Combine 1/4 c. flour, salt and pepper.  Coat the squirrel pieces.

In a Dutch oven, combine bcon and butter over medium heat until butter melts.  Add squirrel and brown.

Add water, tomatoes, onion and brown sugar and bring to boil.  Reduce heat, cover and simmer for 1 1/2 to 2 hours, stir occasionally.

Remove squirrel pieces and let cool.  Remove meat from bones.

Add meat, potatoes, beans and corn to Dutch oven.  Heat to boiling, reduce heat and cover.  Simmer until potatoes are tender.

Mix 3 T of flour with 3 T of cold water, then stir into stew.  Heat to boiling.

Cook over medium heat, stirring constantly, until thickened, bubbly.

Serve with warm rolls and enjoy!


I wish all of you better luck than we had.  

:-(


THREE EGGS AND THE MOM

There is one more egg in the nest!  Mom has been busy and I'm sure she's hoping for warmer weather around here soon!  She spends a lot of time on the nest keeping those eggs warm and safe from predators . . . like squirrels.  We have a lot of squirrels in our yard all the time, and as I stated yesterday, I'm looking at them a little differently these days.  I always thought squirrels stuck to acorns, but apparently they also have an appetite for Robin eggs and hatchlings.
Here's a close-up of Mama.  I wasn't actually this close to her - I cropped the picture quite a bit so you could get a good close look at her.
 And here's what's going on inside those eggs . . .
So, I'll check tomorrow and see if there's another egg.  She may be done though.  We'll see!


Friday, April 20, 2012

Two Eggs and a Science Lesson

Open the door, put your arm out with the camera in hand, and SNAP!  That's how close this nest is! Since I can so easily see the day to day developments going on in this beautiful little nest, I have to document them!  So, we are now up to two eggs.
 I wondered about the white streaks on the first egg.  After looking around on the internet for a few minutes, I got my answer.  The first egg was definitely moving when it received its pigment.
10 fun facts (and some not so fun) about the American Robin:

1.  Only the mom builds the nest and sits on the eggs.  
                   
2.  The eggs will hatch 14 days after being laid in the nest.  (That puts our birthday party at  May 2nd!)
                   
3.  There should be 3-5 eggs when she's finished.

4.  The eggs will hatch within 2 days of each other.

5.  The male will help with the feeding of the hatchlings. 
                  
6.  The new little robins will be ready to leave the nest 14 days after they hatch.
                   
7.  Mom will dive-bomb any intruders to the nest (cats, birds, or HUMANS!)

                                                                        
and sadly . . .

                   
8.  The American Robins are "super-spreaders" of the West Nile Virus.  
                   
9.  Only 25% of the hatchlings will survive to November.
                 
10.  Robins make great snacks for cats, crows, and SQUIRRELS!  


I had no idea that squirrels ate robins.  

Wish I didn't know that.

I hope I never witness that.

 I used to like squirrels.

:-/


Wednesday, April 18, 2012

ROBIN'S EGG BLUE

Just a little update on the beautiful bit of nature's architecture by our back door.  I was afraid that maybe our mother robin had abandoned the nest since I hadn't seen her for a few days.  Maybe she was taking her last few flights of freedom before she would need to be confined to the nest to keep the eggs warm. 
Regardless, upon checking the nest today I got a picture of the first,
perfect, blue egg and I thought you'd like to see it too!
Beautiful!  Just think of the little baby robin that's developing and growing,
getting ready for its chance at the world inside that egg!


LinkWithin

Related Posts Plugin for WordPress, Blogger...