Sunday, September 18, 2011

INSECT JAR - TRIAL RUN #1

  Before the girls arrive for a night of creepy creativity, I thought it would be a good idea to have a trial run.   So, first of all, here is another look at my model right out of the October issue of Country Living Magazine:


 I tried out a "Spider Jar" using a clear glass bottle with a clear glass stopper.  This is the perfect jar for this project and it came from Goodwill for only $1.99.   This jar is about 12" tall and 5" wide.
 I want to try doing this project two ways - painting the inside for one piece, and the outside of another. Tonight I'm working on one that is clear glass, so it will be painted on the inside.  It's a perfect jar for this because the stopper is partially hollow.  If it was solid glass you''d have nowhere to put the paint but on the outside.  Remember to check for that when you're out looking.  I've often thought that a certain cake plate or candy jar would be good, but the stem would never get any "inside" paint.
 So I put several tablespoons of white acrylic paint in the jar, added about the same amount of water, and blended it all with a long brush.  Then, I rolled the jar around in my hand to cover the whole inside.  You may need two coats depending on how much water you use.  I think one coat will do for mine.
Then, do the same thing with the stopper.  Any paint that gets on the outside of the stopper or jar can be washed off after it dries.

Then for the spider graphic!  I got this great taratula off the Graphics Fairy here


  I sent it to the printer after decreasing the size a bit.  As you can see above, 100% it was WAY too big - it filled the page and my jar isn't that big.


But, 60% was just right.


Then, cut it out as close to the hairy legs as possible, since you don't want too much of the white printer paper to be showing. 


Ideally, none would show, but good luck with that!   Then I attached the spider to the jar using an Elmers Glue Stick.

So, after spraying with gloss polyurethane, it goes under a cloche for now.  I'll wait until the inside is completely dry to put the lid on.

I can't wait to add more, but right now, I hear Norma calling!

Sharing this on the
and
White Wednesday
and
The Lettered Cottage


CREEPY BUT FUN - INSECT DISHES FOR FALL DECORATING

I just got the October 2011 issue of Country Living Magazine.  
Have you seen it?  
There is an article about some really unusual, but incredibly expensive, insect dishware.  Way out of reach for me, and nothing I'd actually want to eat off of, but I think it would be fun to fix up some similar shaped jars for Fall/Halloween decorating. 
Set of 3 Jars: Spider & Insects
Above:  From Country Living:  Set of 3 jars:  $170Below:  Also from Country Living : $73, $50, and $35

Dinnerware Set: Insects


The Graphics Fairy has plenty of insect graphics which are free to download and print!  Here are just a few of the possibilities.  I'd probably print these out in black and white.


I have a great group of friends who are willing to come over and get creative - so in a few short weeks we'll all have some insect accessories to help us with our fall holiday decorating.  A little mulled wine, a pot of soup simmering away, and a fire in the fireplace . . . 
PROJECT NIGHT!
They just need to take a trip to their nearest thrift shop for some suitable jars or plates, print out some great insect graphics, and pack up their scissors!  Results will be posted as soon as we're done!


Saturday, September 17, 2011

HOSTA ROSE

 I was cruising around some blogs this morning and saw this little tutorial on making a rose out of maple leaves.  I love the idea of using flowers and leaves for something other than the expected.
autumn crafts - maple leaf roses
This is a photo from the above link - it's so easy.  Why didn't I ever think of this?


So, here's my thought process:

(Glance out the front window at the trees) 
Our maple leaves are still on the tree.
They are big, full-grown trees.
Tree-climbing days are over.
(Look out the back window to the garden)
What plant in the garden has nice, big, pliable leaves?
Hosta!
We have tons of hosta.
They are reachable.
The frost will get them soon anyway.
Hosta leaves are big and pliable.
You could probably make the same thing out of hosta leaves.
A little leaf bouquet would be pretty on a gift - instead of a bow.
I need to wrap a gift for a friend.
Today.
In less than 2 hours.
Where are my scissors?

So, scissors in hand, out I went to retrieve my victims.

The rest is history.

Said victims.
Just fold in half . . . (Nice nails.  Thanks Norma.)
  . . . and roll it up.  Then just keep adding more leaves using a little dab of hot glue to hold each leaf onto the growing bundle.
 Use some open leaves to cradle the rose, snip all the stem ends even, and, voila!
A Hosta Rose!


I punched a border onto a manilla tag and we're ready to head to the party!

 I couldn't put this post up before noon because some people like to peek!
(Pamela!)
So what's in the boxes?  A little bling, and something very hare-y!

(Truly, no offense intended to Norma.  She's worth it.)


Friday, September 16, 2011

BIRD PILLOW and MORE

I've been working on lots of pillows.  Some are finished and some are in the works.  Below is the bird pillow I spoke about in my previous post.  The bird is from the Graphics Fairy - printed, cut out, and ironed onto script background fabric that is described more below.  
Below is a  sampling of some other pillow tops that are sitting in my sewing room - waiting to be assembled.
 Another hare on burlap . . .
an "old" pumpkin label on burlap - perfect for Fall and Halloween . . .
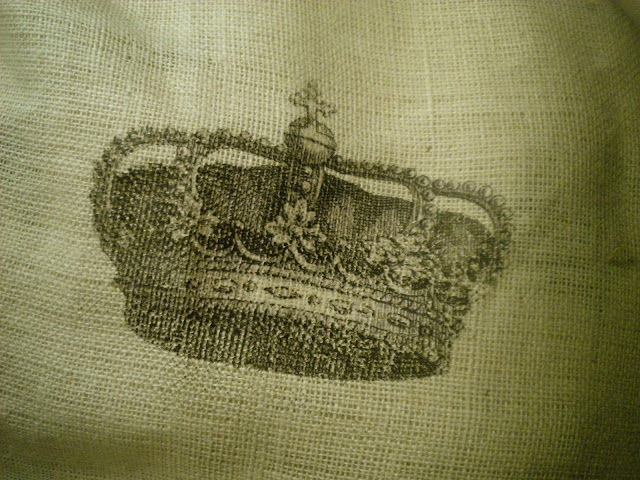
 . . . a large crown on burlap . . .
 . . . a nest and bird on burlap . . .
 . . . and a small little hare on canvas.

All of the graphics are from - who else but the Graphics Fairy! 

The burlap bag with fabric roses is also in progress.  It was a frustrating sewing day, with broken needles and a lot of mistakes which led to a lot of seam ripping.  But, below are the fabrics that make up the bag.
 
 A Waverly fabric with French script.
 The fabric roses made of a green linen. . .
  . . . and the burlap in the background.

Will I ever run out of burlap? 


Wednesday, September 14, 2011

NEST PILLOW

Out of the three projects described yesterday, I decided to make a NEST PILLOW first.  The first step is to put the design onto a word document.  You'll want to fit as much as you can onto the document - so think ahead to future projects.  This transfer paper (TAP) runs about $2.50 a sheet so you want to make the best use of every inch.  I got enough on my sheet to make 2 Nest Pillows, 2 crowns for the collage idea on the bird pillow, and 2 labels for identifying the Brown Thrasher.  
REMEMBER TO REVERSE YOUR LETTERS 
or it will iron on in reverse and you will have wasted a whole sheet.  
I know.  I've done it.  

Here's what I sent to my printer:


I know it's small, but I wanted to show how you can fit everything onto one sheet.  So - you get the idea . . .

I used a font called "The King and Queen".  I downloaded it free from here.  It's a great font - big and swirly, and a little funky, with great capital letters that have all sorts of big curls.  After it's printed out, cut the pieces you want to use really close to the design - and remember - it's been printed in reverse so it'll iron on correctly.  The closer you can get to just the design area when you cut, the less chance for any of the plain, unused transfer paper to show on your fabric - since the plain areas can have a bit of shine, especially if you're using a darker cloth.

 
After it's ironed on, then you put it together like any pillow - right sides together, sew about 5/8" all around leaving about a 5" opening on the bottom seam for stuffing.  After it's stuffed, just hand sew the opening closed.  Since I am filling this with fiberfill, instead of a pillow form, there's no need for a closure of any kind. 
 The nest and bird are from the Graphics Fairy.  You could scroll through her graphics for hours - it's never-ending!


I worked on about four other pillows which aren't sewn together yet - so those will be for another day.

But, here is just a little peek at another hare pillow.  After talking to my mom this afternoon (who is a great fan of hares in every shape and form) I knew she needed a European Hare Pillow of her own. I thought the burlap might be a little too nubby and casual for her home - so hers is on a very pale blue handkerchief linen.  
(If you'd rather have burlap, mom, I could make that!)

But, for now, it's getting late . . . and I'm tired.

Tomorrow's another day!

(It's also going to be a day for a bag with burlap roses!)


Tuesday, September 13, 2011

BURLAP ROSES, NESTS, AND BIRDS

Burlap roses, nests, and birds are everywhere.  They are popular motifs for pillows, bags, and all kinds of decorative items.  So, today I am going to start working on three things.  One with a burlap rose, one with a nest motif, and one with a bird.

First, some inspiration . . .

Nancy is an extremely creative blogger friend of mine and
has a great tutorial on this burlap bag:
Burlap Purse with Shabby Rose, Purse Tutorial, Burlap Tote

Next, Pottery Barn once sold a beautiful "Nest Sentiment" lumbar pillow on their site for $49.  However, it is no longer available.  Hmmmm . . .

and last but not least . . . for the birds . . .

This first bird pillow is sold at Pottery Barn.
Bird Embroidered Pillow Covers


I would like to use a printout of one of my bird paintings for the pillow - probably my Brown Thrasher.  I painted him from a photo in a magazine I saw while sitting in a waiting room somewhere a while back.  The painting is in my Etsy shop, but why not get a little more mileage out of him?

Brown Thrasher from Birds and Blooms Magazine

This one is pretty too - I like the collage effect with the typography and crown in the background.


So that is my day.  I wouldn't be able to even THINK about doing any of this if I was still in the classroom.  I can't even describe how wonderful it feels to be able to make things to my heart's content!

 And yes, I am working on recovering the bergere chair I spoke about a few days ago.  However, our dinner party has been postponed for a bit.  Therefore, with the pressure off, it's on the back burner.  It IS sitting in my living room though - in a state of unfinishedness.  


This will get to me.  


Soon.

LinkWithin

Related Posts Plugin for WordPress, Blogger...