Showing posts with label giveaway. Show all posts

Sunday, October 28, 2012

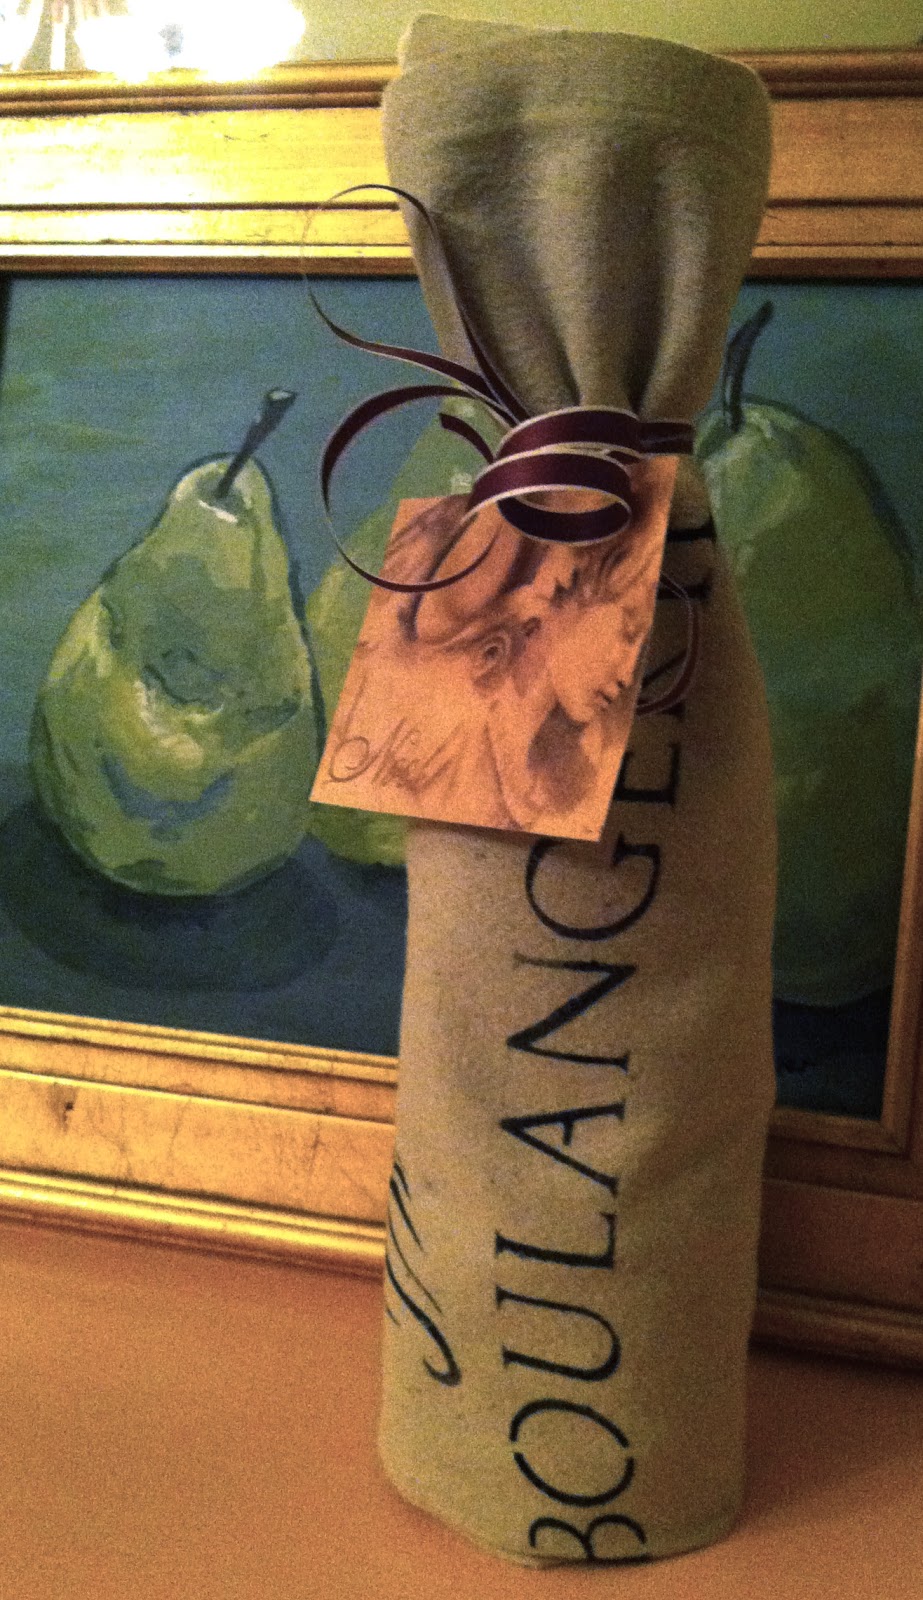
WIN! Angel Wing Baker's Towel GIVEAWAY!

Just a short post to encourage you to 
LEAVE A COMMENT AND WIN A TOWEL!
(DON'T FORGET!  YOU MUST LEAVE ME AN EMAIL ADDRESS SO I CAN NOTIFY YOU IF YOU WIN! EMAIL ME IF YOU STILL NEED TO LEAVE THAT INFORMATION!)

(Drawing will take place TONIGHT at 6 p.m.)
(19" x 29", 100% cotton)

Use it to do the dishes, as intended, or as packaging for a hostess gift.
And all you have to do is leave a comment to enter.  
The towel is packaged and ready to ship on Wednesday with angel tag tucked in too!


Wednesday, September 5, 2012

PILLOWS LEAVE GILLYFLOWER COTTAGE

A while back I made a Burlap Subway Sign Lumbar Pillow for a friend who had just moved into Wauwatosa.  I also put a similar pillow into my Etsy shop, Gillyflower Cottage.  

It's a "Name Your City/Cottage/Lake/Family Name" pillow.  Anything goes, really.  You can read more about it here.
So here are two that were just ordered - one with a family name and one with a city name.  
They were so fun to make!  
1.  Just sew a narrow strip of fabric (I chose a striped brown linen) to a wider strip of burlap for the front of the pillow.  I have three shades of burlap to choose from on Etsy - Natural, Idaho Potato, and Oyster.  the fabric strip sewn to the burlap varies to go with the burlap color chosen.

2.  Then center your word(s) and stencil away using fabric paint and a stencil brush.
 I like to do a practice run on newspaper first so I'm sure to have it centered.  Then line it up with your pillow top and duplicate it on the fabric.  Don't forget to use a strip of masking/painters tape to keep your lettering even as you go across the pillow.
3.  Once you've stenciled the front, cut another piece of burlap the same size as the front.  Put right sides together and sew them together.  Since burlap likes to ravel, I also do a row of zigzag stitch around that to hold it all together nice and tight.  Don't forget to leave about a 10" opening for stuffing the pillow.  My pillows are custom sized so they don't fit standard pillow forms.  I fill them myself with loose acrylic fiberfill.  Just little bits at a time gives you a much more even filling.
4.  Then sew the opening closed, and use a thread of your choosing to do a whipstitch around the edge of the pillow.  The whipstitch is not necessary but gives a nice finishing touch to the pillow.  The size I list is 12" x 28" but these pillows were adjusted at the customers request to fit the name and spot where it will sit.
 Cool name for a city, isn't it?  Jamaica Plain!
 I do my hand whipstitching in a strand of jute to match the pillow.
And they're ready to go!

One more thing! 

I have two exciting posts coming up!  

One will feature a friend's brand new etsy shop - she has beautiful Subway Signs for the home. 

The other will be a giveaway for a $50 gift card to a great little place that features clothing, jewelry, and home items.  

More on both of those soon . . .

Thanks for stopping by!


Friday, February 24, 2012

FABRIC ROSES, SPRING, and a GIVEAWAY!

Spring is just around the corner - it's less than a month away.  At least the official first day of spring, that is!  When I think of spring I think of tilling up the garden, planting flowers, and smelling the earth!  Finally!  Well, speaking of flowers, I saw this pillow on Pinterest the other day.  
pillows
It originated at this blog and she gives a nice little tutorial on how she made it.   So, today I got out several fabrics from my remnant pile and put one together.  This was so fun to make - just free-form stems and leaves - all one continuous line from one side of the pillow to the other.  You just keep turning . . .
 Plenty of overlapping makes it interesting!
 Then just start rolling those fabric roses and use hot glue to adhere them to the top of the stems.  Did you know that they make hot glue for fabrics?  I think the difference is a slower drying time (so you can make adjustments) and more flexibility when dry (making the project a little softer to the touch).
 I also added a few scrap booking "buttons" to the center of some of the flowers.
 More flowers . . .
 And more flowers . . .
 And even more flowers . . .
 And I'm done - 21 in all!  I used green thread for the stem and leaf stitching - burlap, canvas, grosgrain ribbon, and twill for the flowers.
 It's a very heavy pillow top loaded with texture - I love that!
All put together with an envelope closure in the back.  I think this would be a perfect gift for a spring giveaway.  It's full of flowers and spring colors.
And . . . once again, there will be a little extra surprise tucked into the prizewinner's package.
An appropriate time to pull a winner would be on the
FIRST DAY OF SPRING - MARCH 20TH!

So, to enter the GIVEAWAY:

Just leave a comment on this blog post letting me know you are already a follower of You Could Make That, OR please let me know if you are a new follower.  Only followers can win!

OPTIONAL extra entries - do any or all!
1.  Mention my giveaway on one of your blog posts
2.  Do a whole post about my giveaway on your blog.
(The button on the top sidebar is there for you to use.)
3.  Mention the giveaway on your Facebook page with a link back to this post.

Just make sure to leave me separate comments for each extra entry.

REMEMBER!  If you are an anonymous user or have a private profile, please include your email address in your comment so I can contact you if you win!  Or you could email your email address to me if you'd rather stay private.


Good luck!


Sharing on:
Freckled Laundry's Air Your Laundry Friday
My Romantic Home's Show and Tell Friday  Tip Me Tuesday
Coastal Charm  Metamorphosis Monday


Wednesday, February 1, 2012

VINTAGE PRINTED RIBBON TUTORIAL AND A GIVEAWAY!

Here's a fun little tutorial for personalizing your own ribbons.  These would be pretty tied around a bouquet of flowers or a gift for a special friend.  The first time, we made our own ribbons out of torn strips of white linen.  Just tear strips about 1" wide (or whatever size you need to fit the stamp you're using), pull off the loose threads, and start stamping.  I used permanent black ink for mine but this ink comes in lots of colors. These linen ribbons were wrapped around the tags (shown below) we put at each place, the night of our craft get-together in McKinney.  We wrapped a fabric rose out of the same linen to decorate the tags.

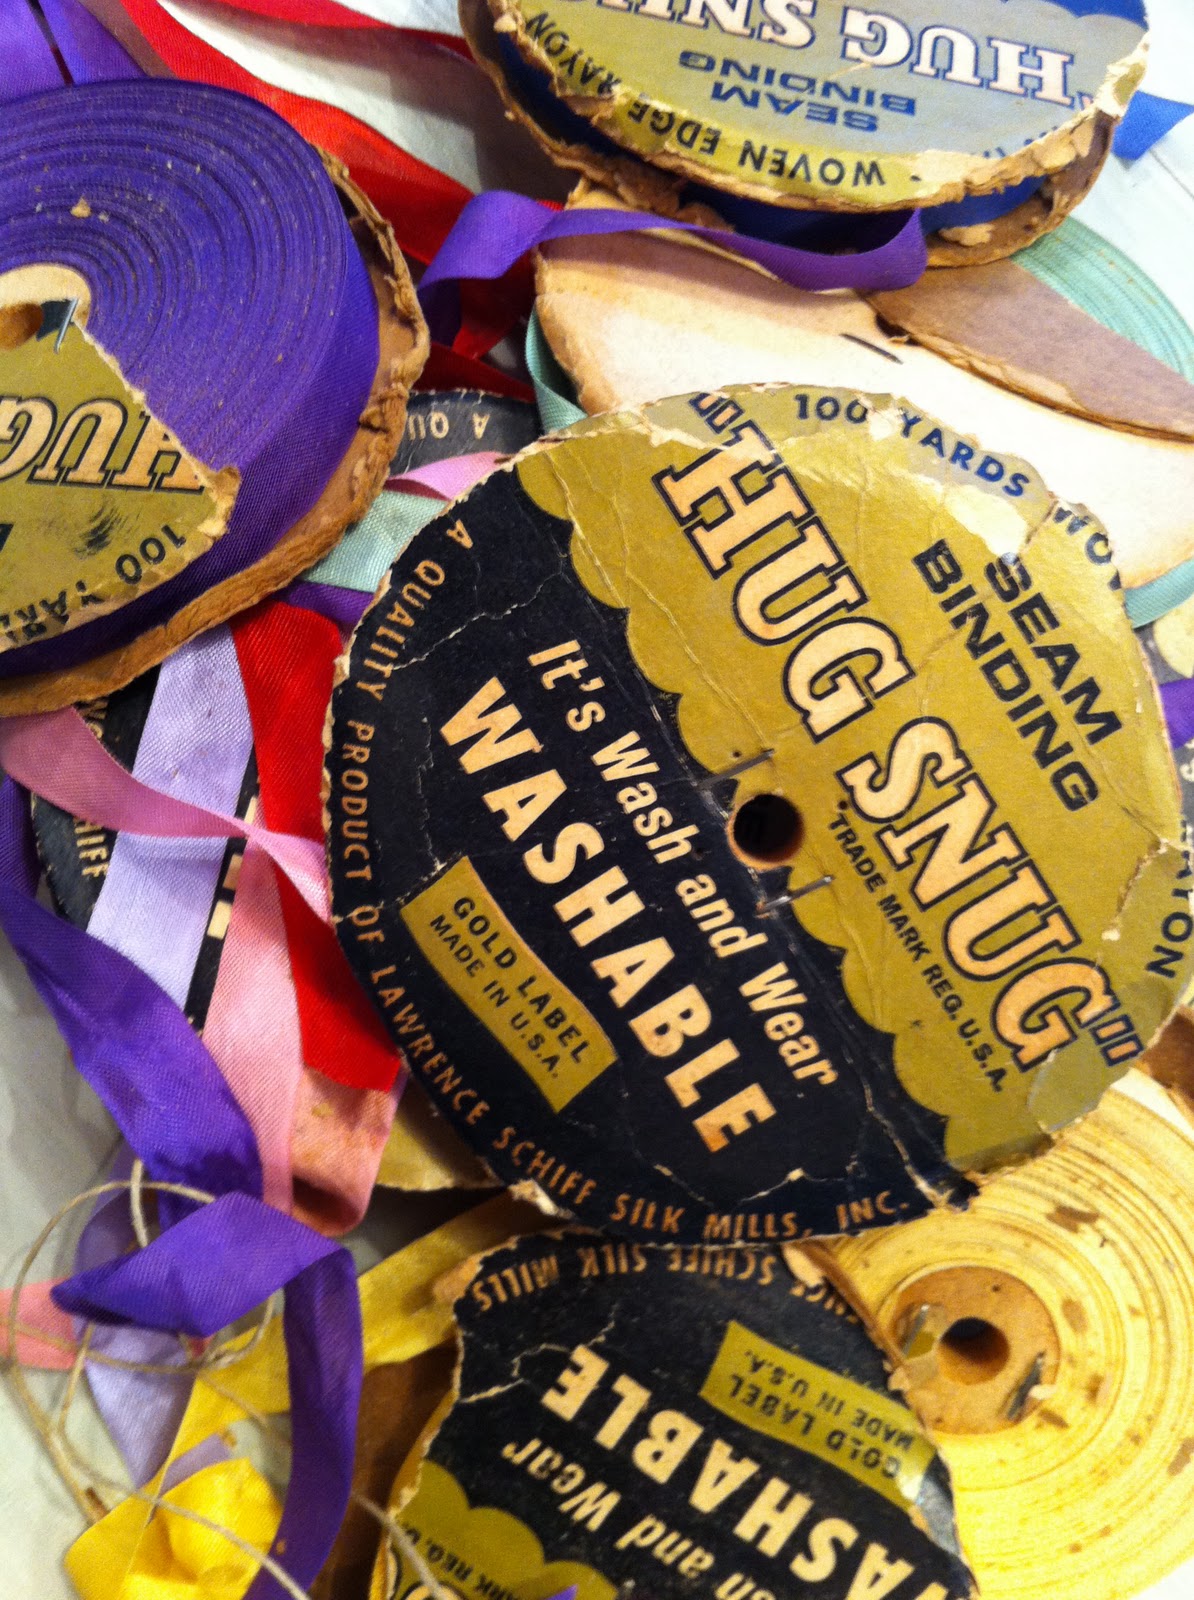
Then we moved on to printing on some vintage ribbons.  These came from a bundle Jan found at an estate sale recently.  She got the whole bag for only $1!!!  What a great find! 
    
 There were tons of colors and the brand, "HugSnug", is still around today. 
 
We printed on some pale blue . . .

red . . .
and cream.

So, once you have the materials, there's nothing to it.  You need:
*ribbon (I think vintage is the best), or torn linen strips
*a permanent ink stamp pad
and
*a stamp with a phrase that will fit on standard 5/8" seam binding ribbon or your ribbon of choice

Just roll out the ribbon and start stamping.  You'll want to line up the stamp to the center of the ribbon, of course.  Don't press too hard or the edges of the stamp will come off on the ribbon too.  It's good to practice a bit on scraps first.  Give it a try!  There are so many great stamps out there - you can make ribbons for every occasion.

You can give the ribbons as a gift - just wrap your stamped ribbons around a vintage postcard from Karen, at The Graphics Fairy and your friends can use them for their own projects.  Or wrap it around a bouquet of flowers.

NOW FOR THE GIVEAWAY!
Expired!!!  Come back for the next one soon!
(International friends - this is for you too!  This will be a very 
light package to ship, so please "follow" and enter!)
These ribbons are so pretty I wanted to share them with a couple followers.  On February 14th, using random.org, I'll choose 2 winners.  Each winner will receive approximately 3 yards of stamped ribbon (either seam binding "ribbon" or fabric "ribbon") wrapped around a bundle of 5 Valentine "Hare" gift tags . . .
This tag is on brown craft paper card stock and printed with the "HARE Dictionary Page" from the Graphics Fairy.
Here are the tags without the ribbon.  They're large (about 3 x 6 inches) and the back is blank, so it's ready for your written sentiments.

The winners will also receive this paper heart swag made with antique book pages,
and . . .
a little something extra!  

Just a little something, but it will remain a secret until the winners open their packages!  Here are the rules to enter:

Just leave a comment on this blog post letting me know you are a follower of You Could Make That.

OPTIONAL extra entries - do any or all!
1.  Mention my giveaway on one of your blog posts
2.  Do a whole post about my giveaway on your blog.
(The button on the top sidebar is there for you to use.)
3.  Mention the giveaway on your Facebook page with a link back to this post.

Just leave me separate comments for each extra entry.  That's 2 winners and 4 different ways to win.

REMEMBER!  If you are an anonymous user or have a private profile, please include your email address in your comment so I can contact you if you win!  Or you could email your email address to me if you'd rather stay private.

That's it!  So easy!

Just a little way to say thank you for all of your kind comments and encouragement along the way.   From California to South Africa . . . it's been fun to get to know you through your emails and your comments over my first year of blogging!  I hope to see some familiar "faces" in the entries!


Sharing on:
Transformation Thursday
Strut Your Stuff
Time Travel Thursday
Show and Tell Friday
Creative Bloggers Party
Craft-O-Maniac
Wow Us Wednesday
Flaunt It Friday
Sister Sunday
Metamorphosis Monday

all crafts Homemade Projects ~ Add Yours! {2/7}


Thursday, June 9, 2011

200 FOLLOWER GIVEAWAY!

I'm getting close to 200 followers and that means it's time for another GIVEAWAY.  This time, the GIVEAWAY is a sign (garden or otherwise) that will be made to order.
From this . . .                        to this, maybe?

1.  To enter, you must be a follower.
2.  Then, you just need to leave a comment on this post
letting me know you're following, and your idea for a sign.

 So, wander around the Graphics Fairy (the best place to find a good design) and find something that is perfect for you.  I'll be using the front panel in this picture - it's about 13" x 14" so keep that in mind when choosing your design.  Look for something that would fit best on a "square-ish" background - like this bird from the Graphics Fairy.  I could put a word, phrase, or family name underneath the bird - or maybe your street address?  You choose!  However, if choosing a graphic is too overwhelming (as my good friend Jan has told me it is!), then just tell me a general idea and I'll find a graphic for you! No worries!

Sunday, June 5, 2011

The Graphics Fairy - DIY Projects Feature and plans for a new GIVEAWAY!

Thank you to Karen, at her Graphics Fairy DIY blog, for featuring my table transfer!   What a fun surprise!  I used one of her great french graphics for this one.  Here is her post . . .

Prettiest Table Ever!


Swoon!!! I'm so in love with this gorgeous table painted by Nan at You Could Make That!


Nan transferred the French Wreath image onto the table, after enlarging it, and then hand painted over the all the lines. Stunning!!! Swing by her site to find out what paint colors she used, and which wax. You'll definitely want to have a look around while you're there, she's truly amazing!
Thank you, Karen!


I cruise through Karen's site daily, and I recently saw a graphic I have to use! I think I could do nothing but wander through the Graphics Fairy and just plan things to do with all those beautiful graphics!  Right now, I'm planning a garden sign using this one from her site:


Of course, the words "Rose Hair Oil" wouldn't work for a garden sign, so I'm going to substitute Le Jardin de Fleurs (the flower garden), below the bouquet, and use the "hare" picture below for above the bouquet.  Can't wait to get started!  I think the "tombstone" shape of the graphic will look nice leaning against the picket fence in my garden!


Also, my followers are fast approaching 200!!!!  So I'm starting to think about a good GIVEAWAY!   I'll need one when I hit that milestone.  I think a garden sign would be appropriate!  Any other suggestions??? 

Wednesday, January 26, 2011

Sweet 100 Giveaway!

Spring is coming and who wouldn't like to celebrate with a sweet little bird's nest adorning their wall? When my followers list hits 100, I'll be giving away this original 5"x5" acrylic painting on gallery wrapped canvas, to celebrate the milestone!


AND
one of these labeled jars to hold that first green sprig when spring finally arrives!


To enter the giveaway, all you have to do is:
1. become a follower of You Could Make That, and
2. leave a comment stating where you might hang the "Little Nest" in your home. For an extra chance to win, please post the giveaway to any of your social networking sites (facebook, blogger, and/or twitter),
and don't forget to leave a separate comment here for each social networking
site you posted the giveaway to. You must leave a comment for each entry! If you choose to remain anonymous, please leave me your email address so I can contact you. The winner will be determined by Random.org.

Good luck and spread the word!


LinkWithin

Related Posts Plugin for WordPress, Blogger...